Table of Contents
Introduction
In the choreography of culinary creation, the kitchen sink takes center stage as a vital and versatile fixture. Much more than a simple basin for dishwashing, the kitchen sink is a dynamic hub where the art of food preparation, cleaning, and social interaction converge. As we delve into the heart of the home, let’s explore the multifaceted role and evolution of this essential component in the modern kitchen.
A Historical Tapestry:
The concept of a designated space for washing and preparing food has woven its way through history. In ancient times, kitchens featured rudimentary stone basins or communal areas dedicated to these tasks. Over the centuries, the kitchen sink has evolved from a utilitarian necessity to a design element that reflects the style and functionality of contemporary living.
Kitchen sink Design Evolution:
Modern kitchen sinks are a testament to design innovation. With diverse materials, configurations, and styles available, homeowners can choose a sink that aligns seamlessly with their kitchen’s aesthetic. From classic farmhouse sinks with apron fronts to sleek stainless steel varieties, the design possibilities are as varied as culinary preferences.
The Culinary Workstation:
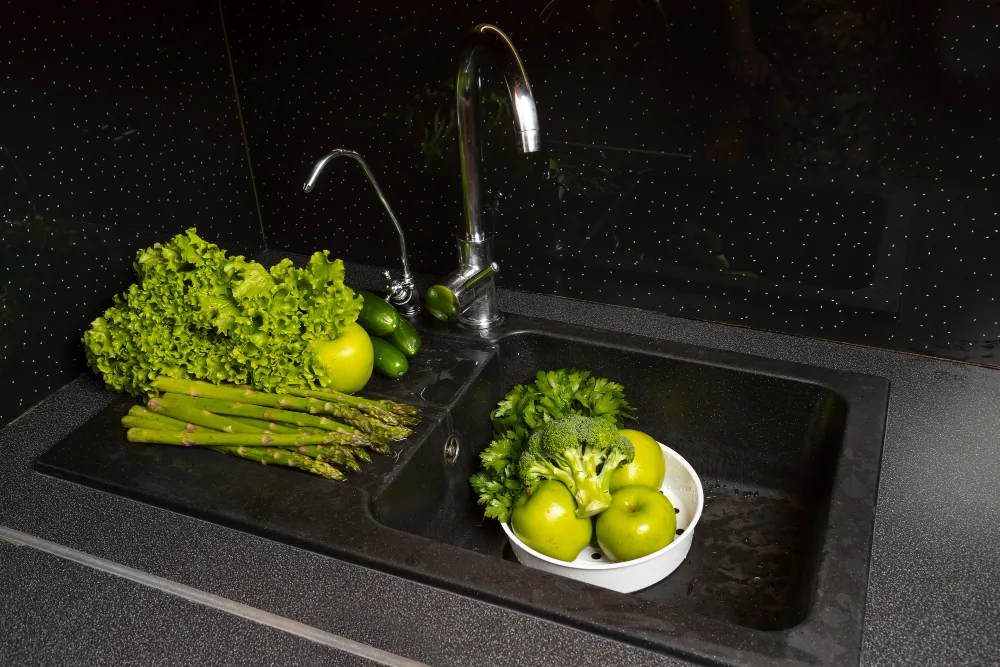
Beyond its primary role in dishwashing, the kitchen sink serves as a dynamic workstation for food preparation. It’s a place where vegetables are washed, ingredients are chopped, and pots are filled. The design of the sink, its accessories, and its proximity to other kitchen elements significantly influence the efficiency and flow of culinary activities.
Materials and Durability:
The choice of materials for kitchen sinks has expanded to accommodate diverse preferences and functional needs. Stainless steel remains a popular choice for its durability and sleek appearance. Other materials, such as porcelain, granite composite, and fireclay, offer a blend of aesthetics and resilience, allowing homeowners to tailor their selection to match the demands of their kitchen.
Functional Features:
Modern kitchen sinks often come equipped with an array of functional features. Integrated cutting boards, drying racks, and soap dispensers enhance the sink’s utility. Deep basins cater to oversized cookware, while double-bowl configurations provide flexibility for multitasking.
Sustainability in Focus:
In response to the growing emphasis on sustainability, kitchen sinks have embraced eco-friendly practices. Water-efficient faucets, recycled materials, and smart technologies that minimize water waste contribute to a more environmentally conscious kitchen. The kitchen sink has become a space where innovation and sustainability intersect harmoniously.
Aesthetic Appeal:
The kitchen sink is not merely a utilitarian element; it contributes significantly to the overall aesthetics of the kitchen. Homeowners can choose from an array of designs to complement their interior style, whether it’s a classic farmhouse look, a sleek and modern vibe, or something in between.
Social Nexus:
In addition to its functional aspects, the kitchen sink often serves as a social nexus. It’s a place where family members engage in conversation while washing dishes or where friends gather for a casual chat over coffee. The sink area becomes a dynamic space, fostering connections and shared moments.
Technological Integration:
Advancements in technology have not bypassed the kitchen sink. Touchless faucets, water purification systems, and smart features bring a level of sophistication to this essential fixture. The integration of technology enhances both the convenience and efficiency of daily kitchen tasks.
As we embark on a journey through the kitchen, the sink stands as a symbol of culinary synergy, where practicality, design, and sustainability harmonize. From its historical roots to its contemporary adaptations, the kitchen sink remains a fundamental component in the symphony of home life—a place where creativity, functionality, and social interactions flow seamlessly.

how to unclog a kitchen sink
Unclogging a kitchen sink is a common household task that can be tackled with a few simple methods. This is a detailed tutorial on clearing a kitchen sink:
1. Boiling Water:
Method: Heat up a saucepan or kettle of water.
Procedure:
Carefully pour the boiling water down the drain in two to three stages, allowing it to work for a few seconds between pours.
Hot water can help break down grease or soap scum causing the clog.
2. Baking soda and vinegar:
Method:
Dispose of around half a cup of baking soda into the sink.
Follow with one cup of white vinegar.
Cover the drain immediately with a plug or cloth to contain the fizzing reaction.
Procedure:
Give the mixture at least fifteen minutes to sit.
Flush the drain with hot water.
3. Plunger:
Method:
Make sure the sink has enough water in it to cover the plunger’s rubber component.
Position the plunger over the drain.
Create a seal, push down, and then pull up sharply.
Procedure:
Repeat the plunging motion several times.
If successful, the water should start to drain.
4. Remove and Clean the P-Trap:
Method:
Place a bucket or basin under the P-trap (the U-shaped pipe beneath the sink).
Remove the P-trap by loosening the slip bolts on both ends.
Procedure:
Empty the contents into the bucket.
Clean the trap thoroughly.
Reattach the P-trap and run water to check for proper drainage.
5. Use a Plumbing Snake (Auger):
Method:
Insert the plumbing snake into the drain until you feel resistance.
Turn the handle clockwise to break up the clog or pull it out.
Procedure:
Run hot water to remove any leftover gunk.
6. Commercial Drain Cleaners:
Method:
Choose a commercial drain cleaner suitable for kitchen sinks.
Follow the instructions on the product label.
Procedure:
Most drain cleaners require pouring the solution into the drain and allowing it to sit for a specified time before flushing with hot water.
Preventive Measures:
Dispose of Grease Properly: Avoid pouring grease or cooking oil down the drain. Instead, let it solidify in a container and throw it in the trash.
Use a Sink Strainer: Install a sink strainer to catch food particles and debris before they enter the drain.
Regular Maintenance: Perform preventive maintenance by using baking soda and vinegar monthly to keep the drain clear.

how to install a kitchen sink
Installing a kitchen sink can be a rewarding DIY project. Here’s a step-by-step guide on how to install a kitchen sink. Note that specific instructions may vary based on the type of sink you have (top-mount, undermount, or farmhouse sink) and the material of your countertop.
Materials and Tools Needed:
New kitchen sink
Faucet
Plumber’s putty or silicone sealant
Adjustable wrench
Plunger
Screwdriver
Pipe wrench
Plumber’s tape
Bucket
Towels or rags
Jigsaw (if modifications to the countertop are necessary)
Instructions:
1. Prepare the Area:
Clear out the space under the sink.
Turn off the water supply to the sink by shutting off the hot and cold water valves.
2. Remove the Old Sink:
Disconnect the plumbing connections underneath the sink.
The sink’s mounting nuts should be loosened and removed.
Lift out the old sink.
3. Inspect and modify the countertop (if necessary):
Check if the countertop cutout fits the new sink.
If modifications are needed, trace the outline of the new sink and use a jigsaw to carefully cut along the line.
4. Install faucets (if not pre-installed):
Follow the manufacturer’s instructions to install the faucet on the sink.
Insert the faucet through the mounting hole and secure it from underneath using the provided nuts.
5. Apply Plumber’s Putty or Silicone Sealant:
For a top-mount sink, apply plumber’s putty or silicone sealant around the edge of the sink opening.
For an undermount sink, apply sealant along the rim of the sink.
6. Place the Sink:
Carefully lower the sink into the countertop cutout.
For top-mount sinks, press down on the sink to compress the plumber’s putty and create a watertight seal.
7. Secure the Sink:
Underneath the sink, attach mounting clips or brackets according to the manufacturer’s instructions.
Tighten the clips or brackets to secure the sink in place.
8. Connect the Plumbing:
Reconnect the plumbing components. This includes the P-trap, tailpiece, and any other pipes.
To guarantee a tight seal on threaded connections, use plumber’s tape.
9. Check for Leaks:
After turning on the water supply, look for leaks.
Tighten connections as needed.
10. Attach the Garbage Disposal (if applicable):
If you have a garbage disposal, follow the manufacturer’s instructions to attach it to the sink drain.
11. Secure the Dishwasher Drain:
If your sink has a built-in dishwasher drain connection, secure the dishwasher drain hose to it.
12. Test the Faucet:
After turning on the faucet, look for leaks.
Ensure hot and cold water are flowing correctly.
13. Seal Gaps:
Wipe down the sink and surrounding areas.
Apply a bead of silicone sealant around the edge of the sink to seal any gaps between the sink and countertop.
14. Clean Up:
Dispose of any debris properly.

how to replace a kitchen sink
Replacing a kitchen sink is a manageable DIY project with the right tools and steps. This is a detailed how-to for changing a kitchen sink. Note that the process may vary based on the type of sink you have (top-mount, undermount, or farmhouse sink) and the material of your countertop.
Materials and Tools Needed:
New kitchen sink
Plumber’s putty or silicone sealant
Adjustable wrench
Plunger
Screwdriver
Pipe wrench
Plumber’s tape
Bucket
Towels or rags
Jigsaw (if modifications to the countertop are necessary)
Instructions:
1. Prepare the area:
Clear out the space under the sink.
Turn off the water supply to the sink by shutting off the hot and cold water valves.
2. Remove the old sink:
Disconnect the plumbing connections underneath the sink.
The sink’s mounting nuts should be loosened and removed.
Lift out the old sink.
3. Inspect and modify the countertop (if necessary):
Check if the countertop cutout fits the new sink.
If modifications are needed, trace the outline of the new sink and use a jigsaw to carefully cut along the line.
4. Install faucets (if not pre-installed):
Follow the manufacturer’s instructions to install the faucet on the sink.
Insert the faucet through the mounting hole and secure it from underneath using the provided nuts.
5. Apply Plumber’s Putty or Silicone Sealant:
For a top-mount sink, apply plumber’s putty or silicone sealant around the edge of the sink opening.
For an undermount sink, apply sealant along the rim of the sink.
6. Place the sink:
Carefully lower the sink into the countertop cutout.
For top-mount sinks, press down on the sink to compress the plumber’s putty and create a watertight seal.
7. Secure the sink:
Underneath the sink, attach mounting clips or brackets according to the manufacturer’s instructions.
Tighten the clips or brackets to secure the sink in place.
8. Connect the plumbing.
Reconnect the plumbing components. This includes the P-trap, tailpiece, and any other pipes.
To guarantee a tight seal on threaded connections, use plumber’s tape.
9. Check for leaks:
After turning on the water supply, look for leaks.
Tighten connections as needed.
10. Attach the garbage disposal (if applicable):
If you have a garbage disposal, follow the manufacturer’s instructions to attach it to the sink drain.
11. Secure the dishwasher drain:
If your sink has a built-in dishwasher drain connection, secure the dishwasher drain hose to it.
12. Test the faucet:
After turning on the tap, look for leaks.
Ensure hot and cold water are flowing correctly.
13. Seal Gaps:
Apply a bead of silicone sealant around the edge of the sink to seal any gaps between the sink and countertop.
14. Clean Up:
Wipe down the sink and surrounding areas.
Dispose of any debris properly.
Congratulations! You’ve successfully replaced a kitchen sink! If you encounter difficulties or are unsure about any step, consider consulting with a professional plumber.

Conclusion:
The kitchen sink is a vital and essential part of daily life, transcending its traditional role as a dishwashing vessel. It has evolved from ancient stone basins to modern materials and styles, offering eco-friendly materials, water-saving technologies, and smart features that align with modern living.
Beyond its practical duties, the kitchen sink serves as a culinary choreography, a workstation for chopping vegetables, a social hub, and a stage for preparing meals. As we install and replace sinks, we recognize their ability to shape the aesthetics of a kitchen, complementing interior styles from farmhouse chic to sleek modernity.
The sink’s enduring significance lies in its multitasking role and its role as a space for contemplation while washing dishes. It represents the evolving needs and aspirations of households, embodying a harmonious blend of form and function. The kitchen sink is a vessel that not only washes away remnants of meals but also witnesses the ebb and flow of life in the heart of the home.
Frequently Asked Questions (FAQs)
What materials are commonly used for kitchen sinks?
Kitchen sinks are often made of stainless steel, porcelain, cast iron, composite granite, fireclay, and copper. Each material has its unique features and benefits.
How do I clean and maintain my kitchen sink?
Cleaning methods depend on the sink material. Generally, use a mild dish soap and water for routine cleaning. For stainless steel sinks, avoid abrasive cleaners that could scratch the surface.
Can I install a kitchen sink myself?
Yes, many homeowners choose to install kitchen sinks as a DIY project. However, it depends on your comfort level with plumbing and construction tasks. If uncertain, consulting a professional plumber is advisable.
What is the difference between top-mount and undermount sinks?
Top-mount sinks sit on top of the countertop, and their edges are visible. Undermount sinks are installed beneath the countertop for a seamless look, exposing only the basin.
How do I fix a leaky kitchen sink faucet?
Common causes of leaks include worn-out washers or O-rings. Turn off the water supply, disassemble the faucet, and replace the damaged parts. If unsure, consult a plumber.
What size kitchen sink should I choose for my kitchen?
The size depends on your kitchen’s dimensions and your personal preferences. Consider the available space, the size of your cabinets, and the depth of the sink basin.
Are farmhouse sinks practical for everyday use?
Farmhouse sinks, with their deep basins and exposed fronts, are popular for their aesthetic appeal and functionality. They provide ample space for large pots and pans and add a rustic charm to kitchens.
How do I prevent clogs in my kitchen sink drain?
Avoid disposing of grease, coffee grounds, and large food particles down the drain. Use a sink strainer to catch debris, and periodically flush the drain with hot water and vinegar to prevent buildup.
Can I install a garbage disposal with any kitchen sink?
Not all sinks are compatible with garbage disposals. Check the sink’s specifications and ensure it has the necessary openings and support for a disposal unit.
What is the average lifespan of a kitchen sink?
The lifespan varies based on the material and usage. Stainless steel sinks can last 15-30 years, while porcelain or cast iron sinks may have a longer lifespan with proper care.